There’s something truly magical about brewing coffee over a crackling campfire. The aroma of freshly ground beans mingling with the smoky air, the warmth of the mug in your hands, and the anticipation of that first sip – it’s a ritual that connects you to nature and awakens your senses. Whether you’re waking up to the sunrise in the wilderness or gathering around the fire with friends, the experience of savoring a cup of campfire coffee is a cherished moment that brings joy and comfort in the great outdoors.
What type of coffee is best for making campfire coffee?
When it comes to making campfire coffee, it’s best to choose a coffee that is well-suited for the outdoors. Opt for a medium to dark roast, as these tend to have bolder flavors that can stand up to the smoky campfire environment. Additionally, look for coffee beans that are specifically labeled as “campfire” or “camping” blends, as they are often crafted to enhance the outdoor brewing experience. Ultimately, the best type of coffee for making campfire coffee is one that suits your personal taste preferences and brings you joy in the wild.
How do you prepare campfire coffee?
Preparing campfire coffee is a simple and rewarding process. Here’s a step-by-step guide to help you make the perfect cup:
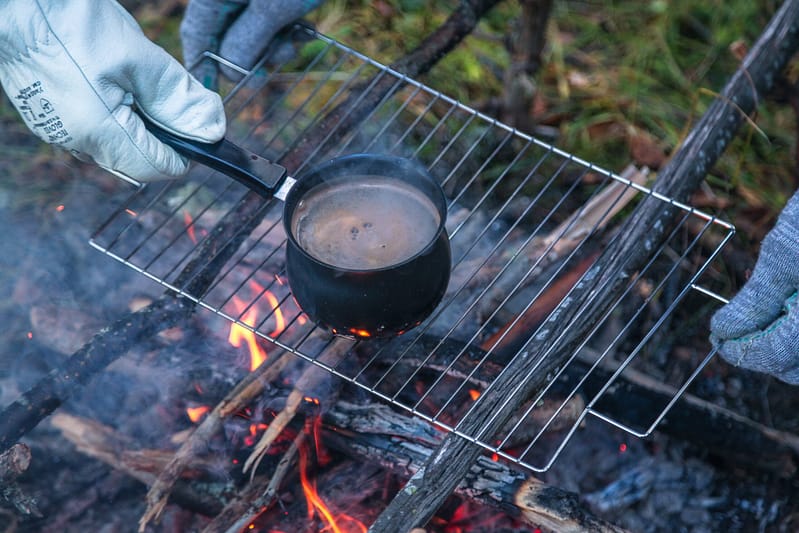
- Start by heating water in a kettle or pot over your campfire. Aim for a rolling boil.
- While the water is heating, coarsely grind your coffee beans. Aim for a consistency similar to breadcrumbs.
- Once the water is boiling, remove it from the fire and let it sit for about 30 seconds to allow the temperature to slightly decrease.
- Add the desired amount of coffee grounds to the hot water. Use approximately 1 to 2 tablespoons of coffee per 6 ounces of water, but feel free to adjust according to your taste preferences.
- Stir the mixture gently to ensure the coffee grounds are fully saturated.
- Let the coffee steep for about 4 to 5 minutes, allowing the flavors to develop.
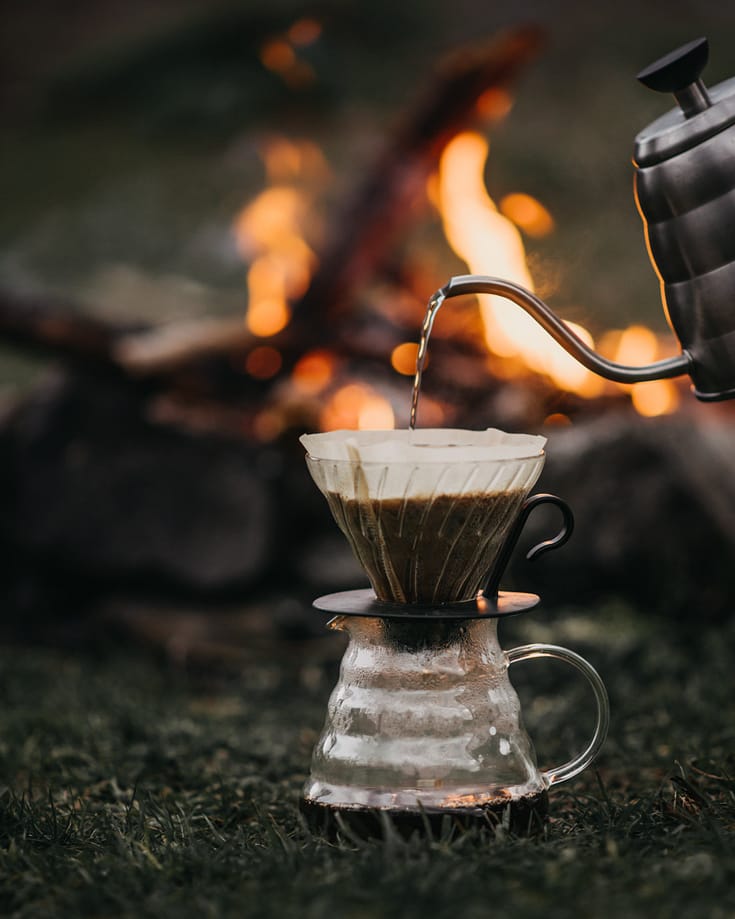
- After steeping, slowly pour the coffee into your mug, using a fine mesh sieve or a coffee filter to catch any grounds.
- Take a moment to inhale the rich aroma before taking that first delightful sip.
- Sit back, relax, and enjoy your delicious cup of campfire coffee amidst the beauty of nature.
Remember, campfire coffee is all about embracing the rustic charm and imperfections, so don’t worry if it’s not as precise as your home-brewed coffee. The experience and the connection to the outdoors are what truly make it special.
What ingredients do you need to make campfire coffee?
To make campfire coffee, you’ll need the following ingredients:
- Water: Fresh, clean water is essential for brewing a great cup of campfire coffee. Make sure you have enough water to boil and brew your desired amount of coffee.
- Coffee Beans: Choose your favorite coffee beans, preferably a medium to dark roast for a bolder flavor that can withstand the campfire environment. Look for beans specifically labeled as “campfire” or “camping” blends for an enhanced outdoor brewing experience.
- Optional Additions: If you prefer, you can bring along additional ingredients to customize your campfire coffee. Some popular options include sugar, milk, cream, or flavored syrups. However, keep in mind that these additions may require extra packing and storage.
Remember, simplicity is key when it comes to campfire coffee. With just water and coffee beans, you can still enjoy a delicious cup of joe in the great outdoors.
What type of pot is best for camping and making campfire coffee?
When it comes to camping and making campfire coffee, a durable and versatile pot is essential. Here are a few options to consider:
- Stainless Steel Percolator: A stainless steel percolator is a classic choice for campfire coffee. It is sturdy, easy to clean, and can withstand high temperatures. The percolator design allows for the coffee grounds to steep and infuse the water, resulting in a rich and flavorful brew.
- Enamel Coffee Pot: An enamel coffee pot is another popular option for campfire coffee. It is lightweight, durable, and has excellent heat distribution. The enamel coating makes it easy to clean and resistant to rust. Look for a pot with a heat-resistant handle for safe handling over the fire.
- French Press: If you prefer a full-bodied and robust cup of coffee, a French press can be a great choice for camping. It is compact, portable, and allows for a simple brewing process. Just add coffee grounds and hot water, let it steep, and press down the plunger to separate the grounds from the brewed coffee.
- Camping Coffee Percolator: Specifically designed for outdoor use, a camping coffee percolator is a convenient option. It typically features a heat-resistant handle, a removable basket for coffee grounds, and a clear knob to monitor the brewing process. It allows you to brew larger quantities of coffee, making it suitable for group camping trips.
Ultimately, the best pot for camping and making campfire coffee depends on your personal preferences and needs. Choose a pot that is durable, easy to use, and suits your desired brewing method.
What are some tips for making the best coffee?
To make the best campfire coffee, consider the following tips:
- Use Freshly Roasted Beans: Opt for freshly roasted coffee beans to ensure maximum flavor. Look for beans with a roast date within a few weeks of your camping trip.
- Grind the Beans On-Site: For the freshest taste, grind your coffee beans on-site just before brewing. Use a portable coffee grinder or a manual grinder to achieve a coarse grind.
- Control the Water Temperature: Allow the boiled water to cool for about 30 seconds before adding the coffee grounds. This helps to achieve the optimal brewing temperature, enhancing the flavors of the coffee.
- Measure the Coffee and Water: Use the right coffee-to-water ratio for a balanced and flavorful brew. A general guideline is to use 1 to 2 tablespoons of coffee per 6 ounces of water, but feel free to adjust according to your taste preferences.
- Let it Steep: Give the coffee grounds enough time to steep in the hot water. A steeping time of 4 to 5 minutes is a good starting point, but you can adjust it to your desired strength.
- Stir Gently: Stir the coffee and water mixture gently to ensure all the grounds are fully saturated. This helps to extract the flavors evenly.
- Filter the Coffee: To avoid grounds in your cup, use a fine mesh sieve or a coffee filter when pouring the coffee into your mug. This step ensures a smooth and enjoyable drinking experience.
- Experiment with Brewing Methods: Explore different brewing methods, such as using a French press or a percolator, to find the one that suits your taste preferences and camping setup.
- Enjoy the Experience: Embrace the rustic charm of campfire coffee and savor the moment. Take in the sights, sounds, and aromas of the great outdoors as you enjoy your cup of joe.

How do you keep campfire coffee warm for a long time?
To keep campfire coffee warm for a longer duration, consider the following tips:
- Insulated Mug or Thermos: Transfer your freshly brewed coffee into an insulated mug or thermos immediately after brewing. These containers are designed to retain heat and can keep your coffee warm for several hours.
- Preheat the Mug or Thermos: Before pouring the coffee, preheat the insulated mug or thermos by filling it with hot water for a few minutes. This helps to maintain the temperature of the coffee for a longer period.
- Wrap the Mug or Thermos: If you don’t have an insulated container, wrap your mug or thermos with a thick towel or cozy to provide additional insulation and keep the coffee warm.
- Use a Coffee Warmer: If you have access to electricity, consider using a coffee warmer or mug warmer. These devices provide a gentle heat source to keep your coffee warm without overheating it.
- Keep the Lid Closed: Whenever you’re not pouring a cup of coffee, keep the lid of your mug or thermos tightly closed. This helps to retain the heat and prevent heat loss.
- Avoid Direct Heat: Keep your coffee away from direct heat sources, such as placing it directly on the campfire or stove. Direct heat can cause the coffee to overheat or scorch, affecting its taste and quality.
- Plan for Small Batches: If you anticipate needing multiple servings of coffee throughout the day, consider brewing smaller batches at a time. This way, you can ensure each cup is fresh and hot.
- Enjoy it Promptly: While these tips can help keep your campfire coffee warm, it’s best to enjoy it promptly for the freshest taste. Coffee can gradually lose its flavor and aroma over time, even with proper insulation.
By following these tips, you can extend the warmth and enjoyment of your campfire coffee, allowing you to savor every sip, even hours after brewing.
In conclusion
To make the best campfire coffee, start with freshly roasted beans and grind them on-site for maximum flavor. Control the water temperature, measure the coffee and water accurately, and let it steep for a few minutes. Gently stir the mixture and use a fine mesh sieve or coffee filter to filter the coffee. Experiment with different brewing methods and enjoy the experience in the great outdoors. To keep campfire coffee warm for a long time, use an insulated mug or thermos, preheat the container, and keep the lid closed. Avoid direct heat and consider using a coffee warmer if available. Remember to enjoy the coffee promptly for the freshest taste.