Imagine the John Muir Trail as a winding ribbon through a wild, living museum. Ready for an adventure that’s etched in every trekker’s bucket list?
This epic trail is your fast-pass to experiencing the sublime grandeur of the Sierra Nevada Mountains—225 miles of pure hiking nirvana. Get set to immerse yourself in the very essence of the wilderness!
Trail Basics Unveiled
So you’re stoked to hit the trail—that’s awesome! Let’s cover some essentials to kick things off. The John Muir Trail, affectionately dubbed the JMT, is no casual stroll in the park. It demands respect, preparation, and a zealous spirit of adventure.
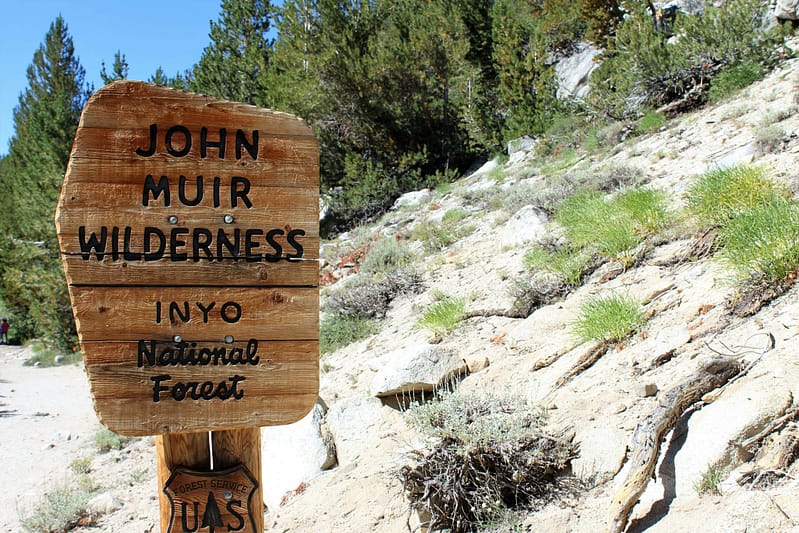
On the JMT, you’ll navigate through alpine meadows, granite peaks, and serene lakes. Remember, this trail spans over 225 miles, stretching from Yosemite Valley to Mount Whitney, touting the title of the tallest peak in the contiguous United States.
And hey, you’ll need a permit to hike the JMT—no winging this one. They’re like gold dust in peak season, so plan ahead and strategize your timing. The memories, though? Absolutely priceless.
Mapping Your Route
Plotting your path on the JMT is more an art than a simple task—there’s a world of details to finesse for a seamless adventure.
The John Muir Trail crosses seven mountain passes over 11,000 feet, each revealing spectacular vistas.
Navigating the JMT requires a keen understanding of terrain, waypoints, and resupply spots. You’ve got to marry the map to the reality—weather patterns, water sources, and campsite locations are your gospel.
Choosing the right season is crucial, because, let’s face it, nobody wants to trudge through post-holes or get snowed in. Start early to finish before autumn arrives, ensuring you hike under the clearest skies and safest conditions.
Timing Your Trek Right
Alright, so let’s talk timing. When you’re plotting to conquer the JMT, nailing the perfect window is key. Like, imagine planning this epic journey and then getting shut down by a blizzard—total bummer, right? Most trail vets aim for a sweet spot between July and September, when the mountains are mostly snow-free, and the weather’s favorable.
Know this: permits drop like hotcakes on release day. Seriously, set your alarm, chug that coffee, and be ready to click with the speed of a puma chasing down lunch.
Counterintuitively, starting mid-week might dodge the weekend warrior rush. It could mean a smoother start (barring unforeseen bear traffic or trailhead paparazzi) and more solitude.
Keeping an eye on the snowpack and melt-off is crucial for high sierra survival. Too early, and you’re a snowshoe ad, too late, and it’s dehydration city.
You’ve also gotta factor in daylight hours because, you know, seeing is essential when you’re trying to avoid tripping over a root or, heaven forbid, a snoozing marmot. The longer days in mid-summer are a huge plus for milking every last drop of sunshine out of your hiking hours.
Lastly, if you’re not into crowds, consider shoulder season jaunts. Cooler temps, fewer peeps, but greater unpredictability weather-wise. It’s a trade-off, but for some, the solitude is worth the extra layer or two.
Gear Essentials for JMT
Strap in, ’cause we’re about to talk gear. Your pack’s going to be your home, so equip it like a boss. Lightweight tent, sleeping bag rated for alpine nights, and a comfy pad are must-haves.
When it comes to clothing, layers are your friend. Moisture-wicking base-layers, insulating mid-layers, and rainproof shells; think onion, but for your bod. And please, don’t skimp on broken-in hiking boots – your feet’ll thank you.
Last tip: a durable water filter or purification system. Stream water might look pure, but trust me, you want it clean before the chug.
Choosing Your Footwear Wisely
Hitting the JMT’s rugged pathways demands solid kicks. Debate all you want, but a sturdy pair of hiking boots is non-negotiable. They give you grip, support, and armor against trail tantrums.
Don’t just grab any old boots. Fit is critical to avoiding gnarly blisters and rebellious toes. Break them in.
Comfort? Sure, but don’t forget the waterproof factor. Sudden Sierra showers? Stream crossings? Waterproof boots keep the pruned toes at bay.
Look for something with a soul-grabbing tread. Rock-hopping, dust-kicking ascents, or snow-skirting treks? You need traction that laughs in the face of slips.
It’s not just about the boots. Socks matter, too. Go for synthetic or wool; they wick moisture and guard against blisters. Fresh pairs? Mandatory. Rotating them is your foot’s best chance to stay happy.
Bottom line, your feet are your ride. Treat them to quality footwear, and they’ll keep the good times rolling, mile after epic mile.

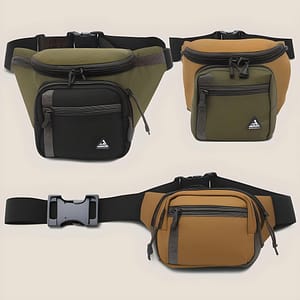
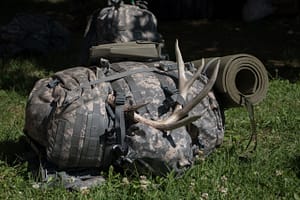
Must-Have Backpack Gear
Out there, it’s you and your pack against the elements, so pack like a pro.
- Navigation Tools: A trail map and compass, non-negotiables for staying found.
- The Ten Essentials: Gear up with this classic list—you know the drill.
- A Reliable Shelter: Tent or tarp, your choice, but it’s gotta stand up to Sierra surprise parties.
- Sleeping System: Bag and pad rated for those chilly high-country nights.
- Cookware and Stove: Keep it light but functional. Hot meals and drinks are pure gold.
- Bear Canister: Not just smart, it’s law in the Sierra. Bears are burglars, and your snacks are the loot.
- Water Treatment: Filter or purification tablets, hydration without the giardia souvenir.
- Food: Calorie-dense and packable. Think of your food as fuel.
- First Aid Kit: Patch yourself up, but let’s hope it’s just for minor scrapes.
- Layered Clothing: The Sierra weather DJ loves to remix; be ready to adapt.
- Lighting: Headlamp or flashlight with extra batteries, cause darkness is no joke.
- Sun Protection: Sunglasses, sunscreen, and hat. Altitude turns the sun into a heavyweight boxer.Light enough to carry, tough enough to survive – choose gear that won’t ghost you.
Each piece of gear needs a reason to take up space in your backpack—make it count.
Mastering Permits & Regulations
Okay, here’s the scoop on permits and regulations: they’re like the bouncer to the JMT party, and you’ve got to charm them to get in. Score a permit through the recreation.gov lottery months in advance; flexibility on start dates and trailheads will boost your odds. And regulations? They’re there to keep you and the trail safe, so level up on Leave No Trace principles. From campfire dos and don’ts to proper food storage (those bear canisters aren’t just adorable barrel-shaped backpack fillers), getting clued up is your ticket to a smoother hike. Respect the rules, and the JMT will repay you with the time of your life.
Securing Your Spot
Alright, let’s talk real-talk about snagging your golden ticket – the permit. You’ve gotta jump through some hoops, kind of like an exclusive club where everyone wants on the guest list, but only a lucky few get past the velvet rope.
Think lottery, not line. You’re aiming for that winning email, not standing at an entrance waiting for your turn.
Applying? That’s where the strategy comes in. Select multiple entry dates (within reason) and backup trailheads to hike your chances.
Don’t dawdle. Set reminders for those critical dates and deadlines; they sneak up faster than a squirrel spotting an unguarded food stash.
Now, after you’ve breathed a sigh of relief at seeing that acceptance email, it’s game on. Time to finesse your itinerary and put those meticulous planning skills to work.
Finally, yeah, the waiting game can be as nervy as waiting to see if your campfire story sticks the landing – but patience, grasshopper. Good things come to those who wait… and with persistence, so will your John Muir Trail adventure.
Leave No Trace Principles
Picture this: you’re among whispering pines and alpenglow peaks, leaving only footprints. That’s the quintessence of Leave No Trace in action.
Think minimalism outdoors. Pack it in, pack it out – always.
Stepping on pristine meadows or cutting switchbacks might save time, but it wrecks delicate ecosystems. Stick to trails and camp in designated spots to minimize your impact.
Imagine the trail’s your own backyard – treat it with the same respect. Avoid feeding wildlife, keep campsites clean, and respect fellow hikers’ experiences. Essentially, it boils down to being a kick-ass guardian of the wilderness, ensuring its majesty endures for generations to come. So remember, it’s not just about taking photos – it’s about preserving those picture-perfect scenes for the next wanderer!
Highlights Along the JMT
Winding past majestic sequoias, the trail brushes against history in the Sierra Nevadas. It’s pure backpacking bliss, folks.
En route, you’ll bag epic peaks like Mount Whitney – the Lower 48’s highest point. And those sparkling, high-altitude lakes? Unreal. They beckon for a brisk dip or pause for reflection, offering a reprieve from the miles beneath your boots.
Prepare for jaw-dropping vistas at every turn, from stark passes to lush valleys. It’s the gold standard of hiking journeys.
Must-See Landmarks
Whitney Portal beckons as the grand finale—or the grand beginning—depending on your chosen route. It’s the gateway to the highest peak in the contiguous United States, Mount Whitney.
At 13,200 feet, Forester Pass serves as the highest point along the trail and a must-conquer landmark. It’s the kind of spot that gives the word ‘epic’ its meaning, with sweeping views that are utterly Instagram-unworthy because no camera does them justice.
Then there’s the resplendent Evolution Basin, a geological marvel that feels like walking through a painting. Surrounded by jagged peaks, it’s a favorite amongst JMT aficionados for its serene beauty and reflective lakes.
Don’t miss the Muir Hut at Muir Pass, an iconic stone shelter built in 1930. It stands as a tribute to John Muir himself and offers shelter to those who trek through the unpredictable Sierra weather. It’s a slice of history with an unparalleled panoramic backdrop.
Finally, no JMT expedition is complete without a nod to the sheer granite spectacle that is Half Dome. Visible from much of Yosemite, it’s iconic, awe-inspiring, and a testament to the monumental power of nature.

Wild Encounters and Night Skies
The John Muir Trail is a hotspot for encountering the wildly diverse fauna of the Sierra Nevada.
- Black Bears: Always secure food and scented items properly, day and night.
- Mule Deer: Graceful and commonly spotted in meadows, they’re a delight to watch.
- Mountain Lions: Though elusive, knowing how to react in a rare encounter is crucial.
- Bristlecone Pines: You might tread among some of the oldest living trees on Earth. Gazing upwards after dusk rewards you with stellar performances of constellations.
And there’s nothing quite like the Milky Way stretching across the unspoiled night sky.
How difficult is it to hike the John Muir Trail?
The difficulty level of hiking the John Muir Trail can vary depending on a multitude of factors. It’s important to consider your level of fitness, previous hiking experience, and overall preparation before embarking on this iconic trail.
The John Muir Trail stretches for approximately 211 miles through the stunning Sierra Nevada mountain range in California. It offers breathtaking views, pristine wilderness, and a chance to connect with nature in a profound way. However, it’s not to be underestimated, as it presents a fair share of challenges along the way.
One of the primary factors that determines the difficulty of this trail is its elevation gain and loss. Hikers will encounter steep ascents and descents, including high mountain passes, which can be physically demanding. Acclimatizing to higher altitudes is crucial to avoiding altitude sickness, so it’s important to allow time for adaptation.
Weather conditions also play a significant role in the trail’s difficulty. Snow can be present at higher elevations, especially earlier in the hiking season. This can make certain sections more treacherous and require additional skills and equipment, such as ice axes and crampons. Thunderstorms are also common during the summer months, so being prepared with proper rain gear and knowledge of lightning safety is essential.
The duration of the hike can impact its difficulty as well. The average completion time for the John Muir Trail is around three weeks, but this can vary depending on your pace and the number of rest days you take. The longer you spend on the trail, the more physical endurance and mental resilience it requires.
It’s crucial to be well-prepared for the challenges of the John Muir Trail. This includes thorough planning, proper gear, and physical conditioning. Packing appropriate backpacking essentials, such as a lightweight tent, sleeping bag, cooking equipment, and food provisions, is essential for a successful journey.
Additionally, having navigation skills and familiarity with backcountry etiquette and Leave No Trace principles is important for the preservation of this pristine wilderness.

How do you resupply food and water along the John Muir Trail?
There are several ways to resupply food and water along the John Muir Trail to ensure you have enough provisions for your journey. Here are some options to consider:
Mail Drops:
Before starting your hike, you can organize mail drops to certain points along the trail. This involves packaging and sending supplies to post offices or resupply locations in advance. This way, you can pick up your packages as you pass through these designated spots, ensuring a fresh stock of food and other essentials.
Resupply at Nearby Stores:
Along the trail, there are a few stores and small towns where you can restock your food and water supplies. These establishments are usually located close to the trail or accessible with a short detour. Though options may be limited, you can find basic necessities to keep you going until your next resupply point.
Hitchhiking to Nearby Towns:
If you’re willing to venture off the trail, hitchhiking to nearby towns can provide more extensive resupply options. This allows you to access larger supermarkets or grocery stores where you can find a wider variety of food, beverages, and camping supplies. It’s important to plan your time accordingly and factor in the potential extra mileage and transportation time.
Seasonal Trail Angels:
Trail Angels are generous individuals who provide support to hikers by offering water, food, or transportation. These kind-hearted souls can be found at certain points along the John Muir Trail during peak hiking seasons. By learning about their locations in advance, you can take advantage of their assistance to resupply if needed.
Water Sources:
While hiking, it’s crucial to stay hydrated. Thankfully, there are ample water sources available along the John Muir Trail, such as lakes, streams, and rivers. You should carry a reliable water filter or purifier to treat water from these natural sources. This way, you can replenish your water supply whenever necessary instead of carrying excessive amounts.
What is the best time of year to hike the John Muir Trail?
The best time of year to hike the John Muir Trail depends on a few factors. The trail spans over 211 miles through the stunning Sierra Nevada range, offering breathtaking views and unforgettable experiences. To make the most of your hike, it’s important to consider the seasons and weather conditions along the trail.
The peak hiking season on the John Muir Trail typically runs from late June to early September. During this time, the snow has melted, and the trail is more accessible. You’ll have the opportunity to witness vibrant wildflowers in bloom, gushing waterfalls, and enjoy longer daylight hours. It is also the warmest time of the year, allowing for comfortable camping and hiking conditions.
However, it’s essential to note that the popularity of the trail during this period means more crowds and increased competition for campsites and permits. If you prefer a quieter and more solitary experience on the trail, you might consider hiking during the shoulder seasons.
The shoulder seasons of spring (April to May) and fall (September to October) can also be great times to hike the John Muir Trail. These periods offer cooler temperatures and fewer hikers on the trail, allowing for a more peaceful and serene experience. However, it’s important to be prepared for variable weather conditions, including the possibility of snowfall at higher elevations and potentially limited access to certain sections of the trail.
Winter hiking on the John Muir Trail is extremely challenging and recommended only for experienced hikers with mountaineering skills. The trail is covered in deep snow, and extreme weather conditions make it dangerous and inaccessible for most hikers.
So the best time is?
So, in conclusion, the best time of year to hike the John Muir Trail is during the peak season of late June to early September if you enjoy warmer weather and don’t mind the increased crowds. If you prefer a quieter experience, consider hiking during the shoulder seasons of spring or fall. Just be sure to check weather conditions and trail accessibility before embarking on your adventure to ensure a safe and memorable experience.