Are you an avid adventurer who loves exploring the great outdoors? If so, then you know how important it is to have all the necessary equipment for a comfortable journey. One essential item that can greatly enhance your overland experience is an overland shower. In this comprehensive guide, we will provide you with step-by-step instructions on how to create your own DIY overland shower. From materials needed to enjoying your refreshing shower in nature, we’ve got you covered! So let’s dive in and discover how to bring a touch of luxury to your outdoor adventures.
Here you can find a useful information regarding showering while camping.
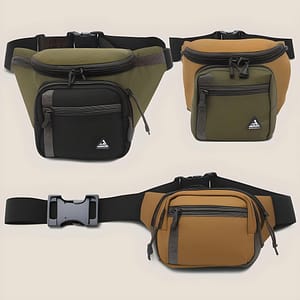
Materials Needed
A high-quality jerry can will securely carry enough water for your overland shower, without any leaks or spills.
1. Water container or jerry can: A sturdy and secure water container is essential for carrying enough water for your overland shower. Opt for a high-quality jerry can that won’t leak or spill during travel.
2. Shower curtain or tarp: To maintain privacy while showering, invest in a waterproof shower curtain or tarp that can be easily set up and taken down as needed. This will ensure you have a comfortable and private bathing experience wherever you are.
3. Hooks and ropes: Securely fasten your shower curtain or tarp by using hooks and ropes to create an enclosed space for your overland shower. Make sure the hooks are durable enough to withstand outdoor conditions.
4. Bucket or basin: While not necessary, having a bucket or basin handy can be useful for collecting excess water during your showers, minimizing waste, and keeping the surrounding area clean. The 5-gallon camping bucket is a versatile and durable option for your overland shower needs. Its large capacity allows you to store ample water, and its sturdy construction ensures that it can withstand the rugged conditions of outdoor adventures. Additionally, the collapsible basin provides a convenient solution for washing dishes or cleaning up after cooking meals while on the go. Its compact design makes it easy to pack and transport, making it an essential item for any overlanding trip where space is at a premium.
5. Soap and toiletries
Biodegradable soap:
- Choose biodegradable soap to minimize environmental impact.
- Look for products that are free from harmful chemicals and safe for the environment.
- Biodegradable soaps break down naturally, reducing pollution in water sources.
Travel-sized toiletries:
- Opt for travel-sized toiletries to save space and weight while on the go.
- These compact products are convenient for camping trips or traveling light.
- Pack essentials like mini shampoo, conditioner, and body wash to stay fresh during your journey.
Step 1: Choose a Suitable Container or Bag
Portable water storage is an essential component for any overland shower setup. Whether you’re camping, hiking, or traveling in your vehicle, having a reliable container or bag to store your water is crucial.
Selecting the right size and material is crucial when choosing a container or bag for your DIY overland shower. Consider the amount of water you’ll need and opt for a container that can hold it comfortably. Additionally, choose a durable and waterproof material to ensure longevity and prevent leakage during your outdoor adventures.
When choosing a suitable container or bag for your overland shower, it’s important to consider both durability and portability. Look for materials that are tough enough to withstand rugged conditions while also being lightweight enough to easily transport. This will make setting up and packing away your shower system much more convenient.
Exploring different container options allows you to find the best fit for your needs. From collapsible water containers to purpose-built camping showers, there are various options available in the market. Research different types of containers or bags that suit your preferences in terms of capacity, convenience, and ease of use before making a final decision on which one is right for you.
A collapsible bucket offers ample space for holding the necessary amount of water while also being compact and easy to transport. Alternatively, using a water bladder provides flexibility as it can fit into different bags or be carried separately as needed. Whichever option you choose, ensure that it meets your capacity requirements and durability needs to make sure you have enough refreshing showers during your outdoor adventures
Step 2: Install the Water Pump
Understanding different types of water pumps is crucial for installing the water pump in your DIY overland shower. Depending on your specific needs, you may choose from submersible pumps, centrifugal pumps, or diaphragm pumps. Consider factors such as flow rate and pressure to ensure optimal performance.
Determining power source requirements is another important step in installing the water pump. Whether you opt for a battery-operated pump or one that requires an external power source, make sure to carefully assess voltage and amperage specifications to avoid any compatibility issues.
Once you have selected the appropriate water pump and determined the power source requirements, it’s time to connect the pump to a suitable location. Ensure that it is securely fastened and positioned at a convenient height for easy access during showers.
By understanding different types of water pumps, determining power source requirements, and connecting the pump properly, you can successfully complete this essential step in setting up your overland shower system.
Here are the two main pump type:
1. 12V Electric Pump: A 12V electric pump is a convenient option for an overland shower setup. It can quickly and efficiently draw water from a container or jerry can, providing enough pressure for a satisfying shower experience. Simply connect the pump to your power source and attach it to your shower head and hose for easy operation.
2. Handheld Foot Pump: If you prefer a more manual approach, a handheld foot pump is another viable option. This compact device allows you to easily pressurize water by using your feet, eliminating the need for electricity or batteries. With its portable design, you can bring this foot pump along on your overland adventures and enjoy refreshing showers wherever you go.
Step 3: Attach the Shower Head and Hose
To ensure an appropriate shower head for overland use, consider a lightweight and compact option that is durable enough to withstand rugged conditions. Look for features such as adjustable spray patterns and easy installation.
I recommend the following two options:
1. Pressurized handheld shower head: A pressurized handheld shower head is a great addition to your overland shower setup. With its compact design, it can easily be stored in your vehicle and taken out when needed. The pressurized feature ensures that you get a strong and consistent flow of water, allowing for a refreshing and efficient shower experience.
2. Extendable shower hose: An extendable shower hose is another essential component of your overland shower setup. This versatile accessory allows you to reach every corner of your outdoor bathing area with ease. It can be adjusted to different lengths, providing flexibility and convenience during your camping trips. With a durable construction, the extendable shower hose can withstand rugged conditions and ensure long-lasting use.
When attaching the hose, it’s crucial to secure the connection tightly to prevent leaks. Use sealant tape or thread sealant on the threaded fittings to ensure a watertight seal. Double-check all connections before testing the system.
To guarantee proper water flow and pressure, remove any debris or blockages from both the hose and shower head before attaching them together. This will help maintain consistent water flow throughout your outdoor shower experience.
Step 4: Set Up the Shower Curtain or Tarp
Waterproof shower curtain:
- Made from durable material that can withstand water exposure
- Provides privacy and prevents water splashing outside the shower area
Tarp with grommets for hanging:
- Heavy-duty tarp with reinforced edges and grommets for easy hanging
- Versatile option that can be used as a makeshift shower curtain or for other purposes such as shelter or ground cover
Selecting a waterproof curtain or tarp material is crucial for setting up your overland shower. Look for durable materials like nylon or PVC that are resistant to water and can withstand outdoor elements. Consider the size of your shower area and choose a curtain or tarp that provides adequate coverage.
When it comes to hanging methods, there are various options for temporary showers. Use bungee cords, suction cups, or adhesive hooks to secure the curtain or tarp to your vehicle’s roof rack, awning, or other stable structures. Ensure the setup is sturdy and properly tensioned to prevent any sagging during use.
Fitting curtains/tarps in different vehicle setups requires flexibility and creativity. If you have an open-bed truck camper, attach the curtain/tarp between two points on opposite sides of the bed using adjustable straps. For SUVs with rooftop tents, hang the curtain/tarp from the tent’s extension poles for privacy while showering.
Remember that proper installation of a reliable waterproof barrier ensures a comfortable and private shower experience during your overland adventures—no matter what type of vehicle setup you have.
Step 5: Secure the Shower Area
Suction cup hooks provide a convenient and secure way to hang items in your overland shower. Whether it’s towels, loofahs, or other shower accessories, the suction cups adhere firmly to smooth surfaces, ensuring everything stays within reach while on the go. Bungee cords are also essential for securing your shower curtain or tarp against strong wind gusts. With their elastic properties and durable construction, they provide reliable tension to keep your privacy intact during outdoor showers or camping adventures.
To secure the shower area, start by setting up a privacy tent or creating a makeshift enclosure using tarps and poles. This will ensure that you have a designated space for showering while maintaining your privacy. Additionally, consider using stakes or sandbags to anchor the tent or tarps securely to the ground, especially in windy conditions. This step is crucial in creating a comfortable and secure environment for your overland showers.
Once you have set up the enclosure, take precautions to prevent any water leakage outside the designated area. Place an absorbent mat or towel on the ground inside the shower area to catch excess water and keep it from spreading onto surrounding surfaces. This will help maintain cleanliness and minimize any potential damage caused by water seepage during each use of your DIY overland shower system.
Step 6: Fill the Water Container or Jerry Can
Plastic jerry can with spout:
- Durable and lightweight
- Easy to transport and handle
- Spout allows for controlled pouring of water
Stainless steel water container with tap:
- Sturdy and long-lasting
- Tap provides convenient access to water without the need for a separate vessel
- Ideal for camping or outdoor activities where a larger quantity of water is needed
To fill the water container or jerry can for your overland shower, locate a clean and safe source of water. Use a dedicated hose or funnel to pour the water into the container, ensuring that it is secure and properly sealed. Be mindful of weight distribution when filling larger containers, as they may affect vehicle stability during travel.
Alternatively, consider using collapsible water bags that can be easily filled and stored when not in use. These are lightweight and convenient options for smaller quantities of water. Remember to check the capacity limits of your chosen container to avoid overfilling and potential leaks while on the road.
Step 7: Test the Shower System
To ensure the functionality of your overland shower system, it is crucial to thoroughly test it before hitting the road. Begin by turning on the water pump and checking for any leaks or irregularities in water flow. Next, adjust the shower head settings and verify that it provides a steady stream of water at your desired pressure. Lastly, evaluate the effectiveness of your shower curtain or tarp in containing water within the designated shower area.
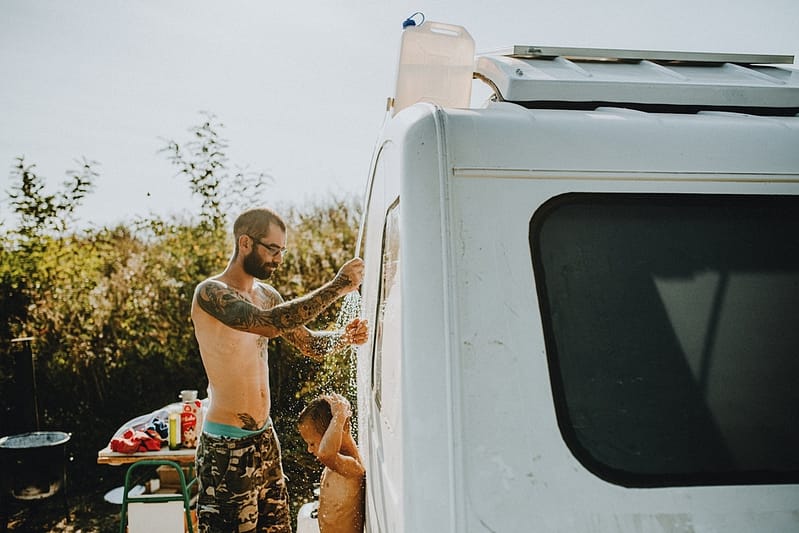
Step 8: Enjoy Your Overland Shower
Now that you have successfully set up your DIY overland shower, it’s time to reap the rewards of your hard work. Step into the refreshing spray of water and let the worries of the day wash away. Embrace this opportunity to connect with nature and rejuvenate both body and mind. Take a moment to appreciate how far you’ve come in creating a comfortable outdoor bathing experience – one that will undoubtedly enhance your overlanding adventures.
Remember, proper maintenance is key to ensuring long-lasting enjoyment of your overland shower. Clean and dry all components thoroughly after each use, avoid using harsh chemicals on sensitive parts, and store everything securely for future trips. With these simple steps, you can continue to relish in the convenience and luxury of an overland shower wherever your journey takes you.
Tips for a Better Overland Shower Experience
- Choose the Right Location:
- Look for a secluded spot with natural cover to ensure privacy and limit exposure. Avoid areas near water sources or sensitive ecosystems.
- Ensure Privacy and Safety:
- Use portable shower tents or create a makeshift enclosure using tarps or towels. Keep an eye out for potential hazards like uneven ground or sharp objects.
Conservation of Water:
- Collect and Reuse Water:
- Place a bucket beneath the showerhead to catch excess water, which can be used for other cleaning purposes.
- Time Your Showers:
- Limit your shower time to conserve water. Set a timer or use an eco-friendly shower bag that automatically shuts off after a certain amount of time.
By following these simple tips, you can enhance your overland shower experience while being mindful of your surroundings and conserving precious resources.
Final Thoughts
Practice Makes Perfect: When it comes to mastering the art of overland showering, practice is key. Take the time to set up and use your DIY shower system before embarking on your journey. This will help you streamline the process and ensure a more enjoyable experience on the road.
Stay Hygienic on the Road: Maintaining good hygiene while traveling is essential for both comfort and health. Keep a supply of biodegradable soap, hand sanitizer, and wet wipes in your overland vehicle to stay fresh and clean during your adventures. Remember to dispose of waste properly to minimize environmental impact.
Enjoy the Outdoors: Overlanding offers an incredible opportunity to immerse yourself in nature’s beauty. Use your DIY overland shower as a chance to connect with the outdoors by finding picturesque locations for bathing. Embrace this unique experience and make lasting memories along the way.