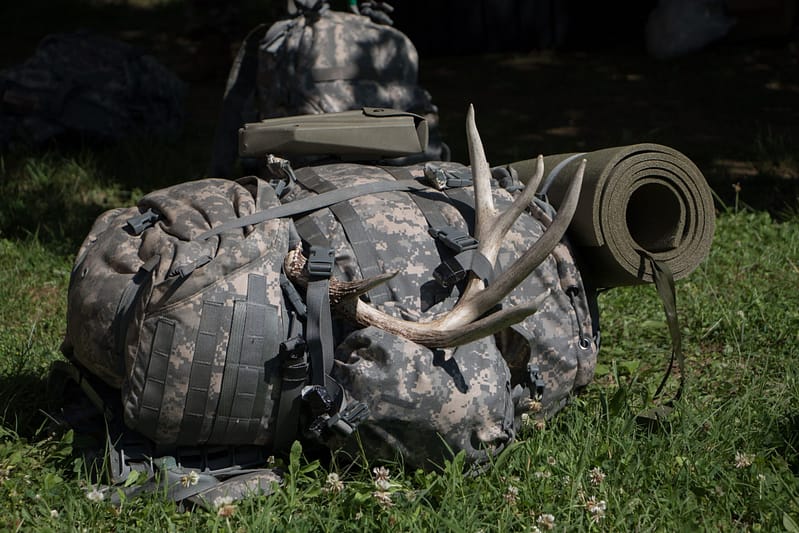
Hitting the trails with a pack that’s all sorts of wrong can turn your outdoor bliss into a back-breaking fiasco. Yet, the art of rucking – long favored by military units – hones both body and mind with a rugged simplicity.
Enter the rucking backpack, a game-changer for outdoor enthusiasts.
Strap in, because we’re about to unpack the essentials of choosing and using a rucking backpack to up your outdoor game.
Is Rucking better than walking?
Rucking, also known as backpacking or weighted walking, offers a different experience and benefits compared to traditional walking.
Firstly, rucking involves carrying a weighted backpack while walking. This added weight creates more resistance and increases the intensity of the exercise. It engages more muscles in the body, including the core, legs, and upper body. This can result in a higher calorie burn and a more effective cardiovascular workout compared to regular walking.
Furthermore, rucking can help improve strength and endurance. The extra load on your back forces your muscles to work harder, leading to increased muscle tone and strength development over time. It also challenges your cardiovascular system, helping to improve endurance and stamina.
In addition to the physical benefits, rucking also provides a sense of adventure and exploration. With a backpack on your back, you can explore various terrains and trails. It allows you to venture to remote and scenic locations, adding a level of excitement and challenge to your outdoor experience.
However, it’s important to note that rucking may not be suitable for everyone. It requires proper form and technique to prevent injuries, especially if you’re carrying a heavy load. It’s advisable to start with lighter weights and gradually increase as you build strength and confidence.
Ultimately, whether rucking is better than walking depends on individual preferences, goals, and fitness levels. If you’re looking for a more challenging and physically demanding workout with added adventure, rucking can be a great option. However, if you prefer a more leisurely and low-impact activity, traditional walking can still provide numerous health benefits.
Choosing Your First Rucking Backpack
Gear up, trailblazer—your quest for the perfect rucking backpack starts here. Think durability meets ergonomics; choose a pack that can take a beating without giving you one. Look for robust materials like heavyweight nylon or polyester and ensure it hugs your torso with adjustable straps for a custom fit. Remember, your ruck’s capacity should mirror your mission—day trips beg for compact, while multi-day treks demand more cubic inches of gear glory. Go forth with a sack that’ll stand by your side, mile after grueling mile.
Key Features to Look For
Durability reigns supreme—seek out robust materials like high-denier nylon that’ll withstand the toughest treks.
Rucking demands endurance, but with the right backpack, you’ll smash miles, not your spine.
A proper fit is paramount; adjustable straps and a contoured frame ensure comfort and prevent muscle fatigue.
Weight distribution is key. Look for a pack with pockets and compartments that let you balance your load evenly across your back.
Comparing Top Beginner Brands
GORUCK bridges toughness with style effortlessly.
When you’re fresh on the rucking scene, brand buzz can feel overwhelming. GORUCK, a brand born from a Special Forces background, raises the bar with military-grade materials and sleek designs. Their packs come engineered for optimum weight distribution—critical for those long hauls. Plus, their Scars Lifetime Guarantee speaks volumes about their gear’s durability and the company’s confidence in their products.
- Waterproof Rucksack Liner – Keep your gear dry no matter what Mother Nature throws at you.
- Hydration System or Water Bottles – Staying hydrated is non-negotiable on the trail.
- High-Calorie Snacks – Nuts, bars, and dried fruit are compact and energy-rich.
- First Aid Kit – Be prepared for unexpected scrapes or blisters.
- Multi-Tool – It’s like a pocket-sized toolbox that can handle a ton of tasks.
- Headlamp or Flashlight – A necessity when dusk falls, or for navigating the dark.
- Extra Layers – Think moisture-wicking base layers and a good insulating jacket.
- Navigation Tools – A compass and map, even if you think you know the route by heart.
- Spare Socks – Blisters can make miles feel like eternity, so keep those feet dry and comfy.
- Emergency Shelter – A lightweight tent, bivy sack, or even a space blanket for unexpected overnights.
Cross-reference your pack with this list to ensure you’re not missing anything basic but crucial.
Crafting your gear list with intention goes beyond mere preparation; it’s an exercise in self-reliance. With the right items securely in your ruck, you’re ready to tackle any trail with confidence.
Balancing Weight for Comfort
Preventing a sore back starts with how you pack. Strategically distribute weight to optimize your rucking experience. Aim for heavier items near the top and close to your back.
Avoid the rookie mistake of lopsided load-outs. Balance keeps you upright and preserves energy.
Remember, dense objects near your spine (think water bladders or food cans) keep the center of gravity in check.
Shift gear to accommodate for changes in terrain or body fatigue, adjusting straps for consistent comfort.
Smart rucking means spreading out bulkier items. Strategically place them to counterbalance each other, creating harmony between backpack and body movement without stressing your muscles unnecessarily.
Ultimately, your ruck should feel like it’s part of your frame. Fine-tune your pack layout until it feels seamless, blending with every stride on your outdoor odyssey.
Training Tips to Ruck Right
To start training the right way, it’s crucial to begin with a comfortable weight. Don’t be too ambitious—this isn’t a powerlifting contest. Start with around 10% of your body weight, gradually increasing the load as your endurance and strength improve. Keep your posture in check too; a straight back and tight core will do wonders for your stamina.
When you’re upping the ante weight-wise, listen to your body like it’s your favorite podcast. If you sense any unusual discomfort, scale back. It’s a marathon, not a sprint, folks. Remember the endgame is all about longevity on the trails, not just your max weight. Regularly mix things up with varying speeds, distances, and even rucking during different times of the day to challenge your adaptability while you build resilience against whatever Mother Nature throws at you.
Starting Out Safely
Diving into rucking? Cool, but let’s talk safety first to keep you in the game.
- Start light with a backpack weight that’s around 10% of your body weight to avoid overloading your frame.
- Select a quality, fitted backpack designed for rucking with proper support and adjustability.
- Make sure to wear the right footwear to maintain traction and protect your feet during long treks.
- Always hydrate before, during, and after your ruck to keep those muscles fueled and recovery swift.
- Gradually increase your distance and weight, allowing your body to adapt to the new challenge.
Ease into it to build endurance and avoid injury.
Remember, it’s a journey—ruck smart and your body will thank you later.
Scaling Up: Increasing Weight Responsibly
As you get comfortable with the basics, inching up the weight becomes the next frontier. Gradually adding a few pounds at a time is key to maintaining proper form and steering clear of injury. This methodical approach allows your muscles, joints, and also your mental grit to adapt without being overwhelmed.
Bump up the weight by no more than 10% each week. It’s a sustainable pace that respects your body’s limits and progression.
Remember, every extra pound requires your body to work harder, increase endurance and strength (especially core stability) and adjust to the extra load.
Jumping up too quickly in weight can increase fatigue risk and lead to poor posture, which might spiral into injury or chronic pain, disrupting your progress.
Strive for adding weight gradually as you get accustomed to the added challenge, making sure the added heft doesn’t compromise your technique. Keep your back straight, shoulders back, and remember the golden rule: Ruck with the weight your body can handle, not the weight your ego wants to carry.
Lastly, don’t be shy to strip weight off if it’s not your day. Pushing boundaries is great, but respecting your body’s signals and taking a step back when needed is the hallmark of a savvy rucker.
Maintaining Your Rucking Gear
Like any trusty sidekick, your rucking backpack needs a little TLC to keep it in prime condition. After each trek, empty it out completely, shake out the dirt and debris, and give it a once-over for any signs of wear-and-tear. Pay special attention to the straps and buckles—they’re the frontline soldiers when it comes to securing your gear, so any damage there can really ruin your day on the trail.
Regular cleaning is key, especially if you’re trekking through mud, sweat, and Earth’s goodness. Most packs can handle a gentle sponge bath with mild soap and water. Just make sure you air-dry thoroughly before your next adventure to prevent any mold or mildew from joining you on your ruck march.
Cleaning and Storage Basics
Your rucking backpack deserves some post-adventure pampering. Think of it as thank-you for its hard work.
- Empty your backpack and give it a good shake to dislodge any loose dirt or debris.
- Use a soft brush or cloth for a dry scrub on the fabric.
- Spot clean any stains with a mild detergent and water.
- For a deeper clean, check if your backpack is machine washable.
- Hang your gear to air dry completely – dampness is a no-go.
Avoid harsh cleaners; they’re the nemesis of your backpack’s material and can shorten its lifespan.
When storing your backpack, find a cool, dry place. Shoving it into a dark, cramped closet can be an open invitation for unwanted smells and mildew.
Repairing Common Wear and Tear
Getting a grip on the basics of pack maintenance helps keep your rucking gear in line. Minor rips and frays? Those you can tackle at home.
In 2021, patch kits and fabric adhesives became the go-to for ruckers patching up their loyal packs. Just apply, let it set, and you’re back to the trails with a bag that’s almost as good as new.
But hold up, if your bag’s seen more miles than your hiking boots, you might need a bit more than a quick patch-up. For those gnarly tears, you’ll need a heavy-duty needle and some robust thread to stitch things back together.
When the buckle bites the dust, don’t despair. Buckle repair kits come to the rescue, hooking you up with everything you need to swap out the busted for the trusty and new.
If a zipper goes rogue and the teeth won’t play nice, that’s when you reach for a zipper repair kit. Just a few tweaks can make a fussy zipper slide smooth again.
conclusion
In conclusion, I hope this ultimate guide to rucking backpacks has provided you with valuable information and insights. Whether you’re a beginner or an experienced camper, having the right backpack is essential for a successful rucking adventure. Remember to consider factors like durability, comfort, and capacity when choosing a rucking backpack that suits your needs. Don’t forget to pack smart and distribute the weight evenly to avoid unnecessary strain on your body. So grab your rucking backpack, hit the trails, and enjoy the great outdoors with confidence. Happy rucking!


