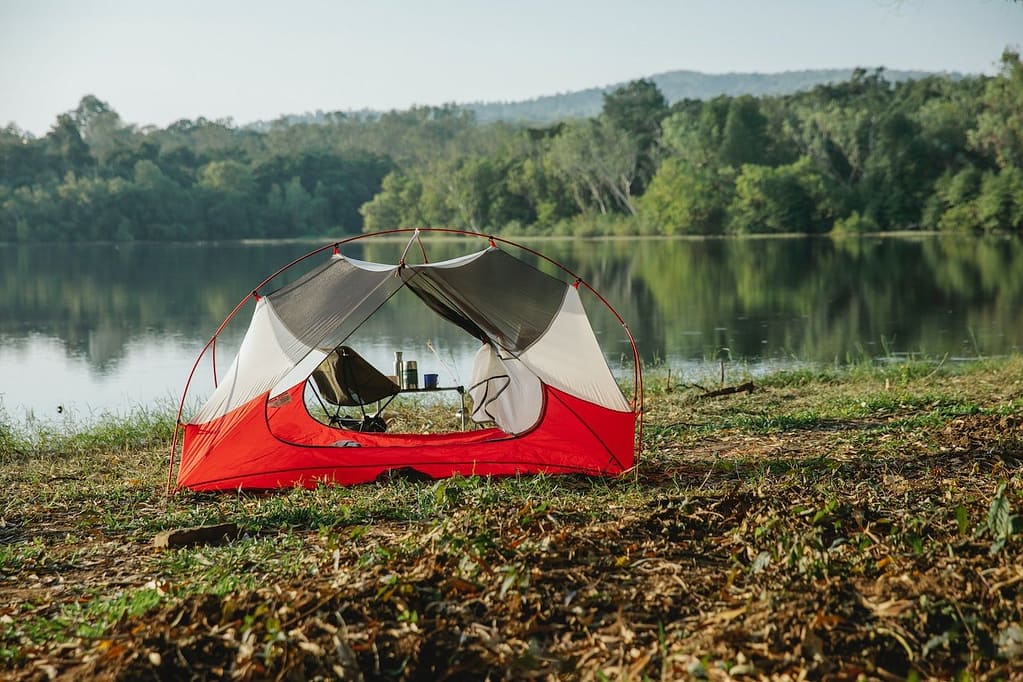
Well, here we are at our location, and now we have to start setting up the living area for the duration of the stay. One crucial aspect of a successful camping trip is to know how to stake a tent proprtly.
So, the terrain of the area is not exactly what we thought it would be – is it moist soil? Hard ground? Or perhaps you’ve decided to set up camp on the beautiful, yet unpredictable, sea sand? Let’s sort out the mess to anchor the tent in the safest and most convenient way.
Types of Soil That Should Be Understood When Approaching The Art of Staking a Tent
Firsty, let’s break down the soil types we may encounter in different camping locations.
1. Soft/Loose Soil: This type of soil can be sandy or loose, making it challenging to secure tent stakes firmly. Sand anchors or longer, specialized tent stakes designed for soft soils can be used to provide better stability.
2. Hard/Compact Soil: Hard or compacted soil can be challenging to drive regular tent stakes into. You may need to use a mallet or a rock to hammer the stakes into the ground securely.

3. Rocky Ground: Rocky terrain can prevent conventional tent stakes from being driven in. In such cases, you can use alternative methods like tying guy lines to heavy rocks or using specialized tent anchors designed for rocky ground.

4. Grassy Ground: Grass-covered soil can be relatively easy to stake a tent into, but you might need to clear away the grass to expose the soil for better penetration.

5. Clay Soil: Clay soil can become hard and compact when dry, and sticky when wet. If the soil is dry, you might need to use longer stakes or pre-soak with water the ground to make staking easier. In wet conditions, you can use larger, more substantial stakes to prevent them from pulling out.
6. Frozen Ground: In cold environments, the ground might be frozen, making it impossible to stake a tent conventionally. You may need to use anchors designed for ice and snow or find alternative methods of securing your tent.

7. Sandy or Beach Sand: Beach sand can be challenging for traditional tent stakes, as they can easily pull out. Sand anchors, sandbags, or specialized beach tent stakes can be used to secure the tent on sandy surfaces.

What materials are needed to stake a tent?
To stake a tent, you’ll need a few essential materials:
1. Tent stakes (or tent pegs):
These are the metal or plastic pegs that you drive into the ground to secure your tent. Different types of stakes are available depending on the soil type and camping location.

Recommended stakes according to the soil type:
- For soft/loose soil, consider using sand stakes, longer stakes with wider profiles, or specialized tent stakes designed for sandy or loose surfaces. Plastic stakes are often not suitable for this type of soil as they may not offer enough friction to hold well.
- For hard/compact soil and for clay soil, use strong and durable tent stakes designed for tough ground conditions. Stakes with a sturdy “V” or “Y” shape might work well as they offer good holding power in compacted soil.
- For rocky ground, use tent stakes designed specifically for rocky terrain. These stakes are usually more robust and may have features that allow them to grip onto rocks securely.
- For grassy ground, standard tent stakes should work well, as long as the ground is not too hard or rocky underneath the grass.
- For frozen ground, use tent anchors or stakes specifically designed for icy and hard surfaces. Traditional tent stakes may not be suitable for this type of terrain.
- For sandy or beach sand, use tent stakes specifically designed for such surfaces. Regular tent stakes might not provide sufficient grip in loose sand.
2. Hammer or mallet:
A hammer or mallet is necessary to drive the tent stakes into the ground. It provides the force needed to secure the stakes firmly.
3. Guy lines or ropes:
Guy lines or ropes are used to add extra support and stability to your tent. They are tied to the tent and then anchored to nearby trees, rocks, or stakes.

4. Tensioners or adjusters:
These small devices help you tighten and adjust the tension in your guy lines. They are particularly useful in windy conditions, as they prevent the tent from flapping or collapsing.
5. Carabiners or hooks:
If you are planning to camp on rocky groundor on surfaces where stakes cannot be driven into the ground, carabiners or hooks can be used to attach your tent to anchor points such as trees or boulders. This provides a secure alternative to staking.
6. Tool to clear the area around the tent:
If you’r on a grassy ground and the grass is thick or tall, you might need a tool to clear the area around where you plan to drive the stakesinto the ground. This can be a small shovel, a hand rake, or even just your hands if the grass is not too dense. Additionly, It’s important to clear the area around your tent of any debris or rocks that could potentially damage the tent floor or cause discomfort while sleeping.
7. heater for softe the ground
On Frozen Ground, if the ground is particularly hard, you may need to use thawing agents or heat sources to soften the ground temporarilyand make it easier to stake your tent.This can be done by using hot water, a camp stove, or even a heat pack. Just be sure to use caution when using heat sources and follow all safety guidelines.
Optional materials that can make staking your tent easier and more secure include:
8. Tent stake puller:
This tool makes it easier to remove stakes from the ground, especially if the soil is hard or compacted.
9. Tent anchors or sandbags:
These are alternative options for securing your tent on soft or sandy surfaces. Tent anchors are specifically designed to provide stability even on loose or sandy soil. Actually, I highly recommend these, especially for a beach campsite.
10. Extra stakes and guy lines:
It’s always a good idea to have some extra stakes and guy lines on hand in case any of them get lost or damaged during your camping trip. This way, you can quickly replace them and ensure the stability of your tent.
11. Tent footprint or tarp:
A tent footprint or tarp is an additional layer of protection that goes underneath your tent. It helps to prevent wear and tear on the tent floor, as well as providing an extra barrier against moisture and dirt. It can also be used as a makeshift shelter or ground cover if needed.
Remember, the type and number of materials you need will vary depending on the camping location and the soil conditions you encounter. It’s always a good idea to come prepared with a variety of stakes and tools to ensure you can set up your tent securely.
How do you stake a tent securely?
Staking a tent securely is essential to ensuring a comfortable and safe camping experience. Here are some tips on how to stake a tent securely:
Step 1:
Choose a suitable site with relatively even ground to pitch your tenton. Clear the area of any debris or rocks that could hinder staking.
- If you’r on rocky ground, select a suitable site where rocks can be used as natural anchors for the tent.
- If you find yourself camping on frozen ground, it’s important to locate an area that has relatively even ground and minimal snow or ice cover. This will make it easier to stake your tent securely and ensure a stable camping experience.
- For all you beach bums out there, when it comes to staking your tent in the sandy paradise, here’s what you need to know. Find a spot that’s above the high tide line, make sure you’re away from any sneaky water sources, and aim for sand that’s nicely compacted. Nobody wants to wake up floating in the ocean!
Step 2:
Place the tent on the chosen spot and use rocks or other heavy objects to temporarily secure the cornersof the tent.
Step 3:
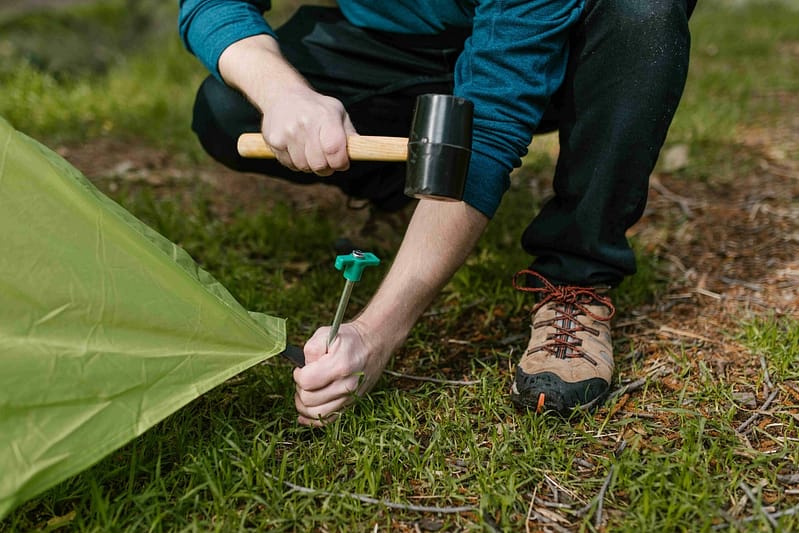
Begin by staking the tent at each corner. Insert the stake into the ground at a 45-degree angle, facing away from the tent.
- Hold the stakes at an angle and firmly drive them into the ground using a mallet or a heavy object. Alternatively, you can position the stake vertically and tap it with a hammer to achieve the same result.
Step 4:
Ensure the stakes are driven deep enough to provide sufficient anchoring but avoid using excessive force, as it might damage the stakes or the ground. Make sure to push it all the way in until only the top loop or hole is visible.
- Hard/Compact soil: Drive the stakes vertically or at a slight angle away from the tent, following the direction of the guy lines.
- Clay Soil: If the soil is dry and hard, water the ground around the intended stake points to loosen the clay and make it easier to drive the stakes.
- Grassy Ground: If the grass is thick, consider using a tool to create a small hole for the stakes to ensure a more secure anchor.
- Rocky Ground:
- If traditional stakes can be used, place them in areas with a bit of soil or gravel between the rocks.
- For areas without soil, use specialized rock stakes that can be wedged between rocks or anchors to secure the guy lines to rocks or other stable points or use sandbags to secure the tent in place.
- Attach the guy lines to carabiners or hooks and then fasten them to stable rocks or boulders to provide additional stability.
- Sandy or Beach Sand:
- If the sand is too soft or loose, use sand stakes or specialized beach tent stakes designed to provide better grip in sandy environments.
- Insert the stakes at an angle, pointing away from the tent, and use a mallet or hammer to drive them into the sand until they are secure.
- Frozen Ground:
- Use specialized tent anchors or stakes specifically designed for frozen terrain. These anchors often have corkscrew-like designs for easier penetration into the hard ground.
- Drive the anchors into the frozen ground by twisting them with a hammer or mallet until they are firmly secured.
- If available, use large rocks to provide additional stability.
Step 5:
Loop the tent’s guyline or webbing through the top hole or loop of the stake and then pull the guyline or webbing tight to ensure a secure connection between the tent and the stake. This ensures that the tent is anchored to the ground.
After securing the tent to the stakes, you can proceed to attach guy lines to each tent corner. Use a secure knot like a bowline or taut-line hitch to tie the guy line to the tent’s corner loops or attachment points.
Step 6:
For added stability, stake out the sides and center of the tent. This will help prevent the tent from shifting or collapsing in windy conditions. Insert the stakes in the same manner as before, at a 45-degree angle and facing away from the tent.
Step 7:
Once all the stakes are in place, adjust the tension on the guyline or webbing to ensure the tent is taut and properly anchored. This will help prevent sagging and ensure stability in windy conditions.
Step 8:
Finally, double-check that all stakes are securely in place and tighten any loose guy lines or webbing.
How deep should you drive the tent stakes?

- When dealing with soft/loose soil, it is essential to drive the tent stakes deep enough to ensure a secure hold. Aim for a depth of about 1.5 to 2 times the length of the stakes to maximize their grip in the soil.
- When dealing with hard/compact soil, grassy ground, and in clay soil, aim to drive the tent stakes deep enough to achieve a secure hold. A depth of about 6 to 8 inches (15 to 20 centimeters) should be adequate in most cases.
- When dealing with rocky ground, it might not be possible to drive stakes deep into the soil. Instead, focus on using the stakes to secure the guy lines to rocks or by using sandbags or specialized anchors.
- When dealing with frozen ground, aim to drive the tent anchors deep enough to achieve a secure hold. The anchors should be inserted fully into the hard ground to ensure stability.
- When dealing with sandy or beach sand, aim to drive the tent stakes deep enough to achieve a secure hold. The depth will depend on the length of the stakes and the density of the sand.
How often should I check my tent stakes?
Regularly check your tent stakes throughout your stay, especially if you expect changing weather conditions or if you notice any signs of loosening. Ensure the stakes are still driven in at the correct angle and re-tension the guy lines as needed to maintain a stable tent setup.
In conclusion, properly securing your tent with stakes is essential for a successful camping experience. It not only ensures stability and prevents the tent from collapsing or shifting in windy conditions, but it also provides a sense of security and peace of mind.